You are here: Ultra Guide>Automation Web>ImprovingTestingWithGithub (14 Sep 2020, JanisRancourt)Edit AttachTags
-- RyanBarrett - 17 Jun 2020
 On the following page, simply create a new repo filling out a repository name and choosing the create repository option. You can also set the repository to be public or private. Public repositiories can be viewed by anyone, while access to a private repository is controlled by the repository owner. An option to import repositories to GitHub also exists.
 Repositories can also be created directly in Git using the steps below.
  From this screen, the user can edit the file contents, preview the file, and set a commit message/description that will appear if the user clicks the Commit new file button, which commits the file to the repository. The user can also select whether or not to commit a file to the master branch or another branch of the repository. These branches can be used to set up even more options for version control.
 Branch creation in Git works similarly, although it works with the Git command line instead of the GitHub website. To start, creating a branch can be done with the following command:
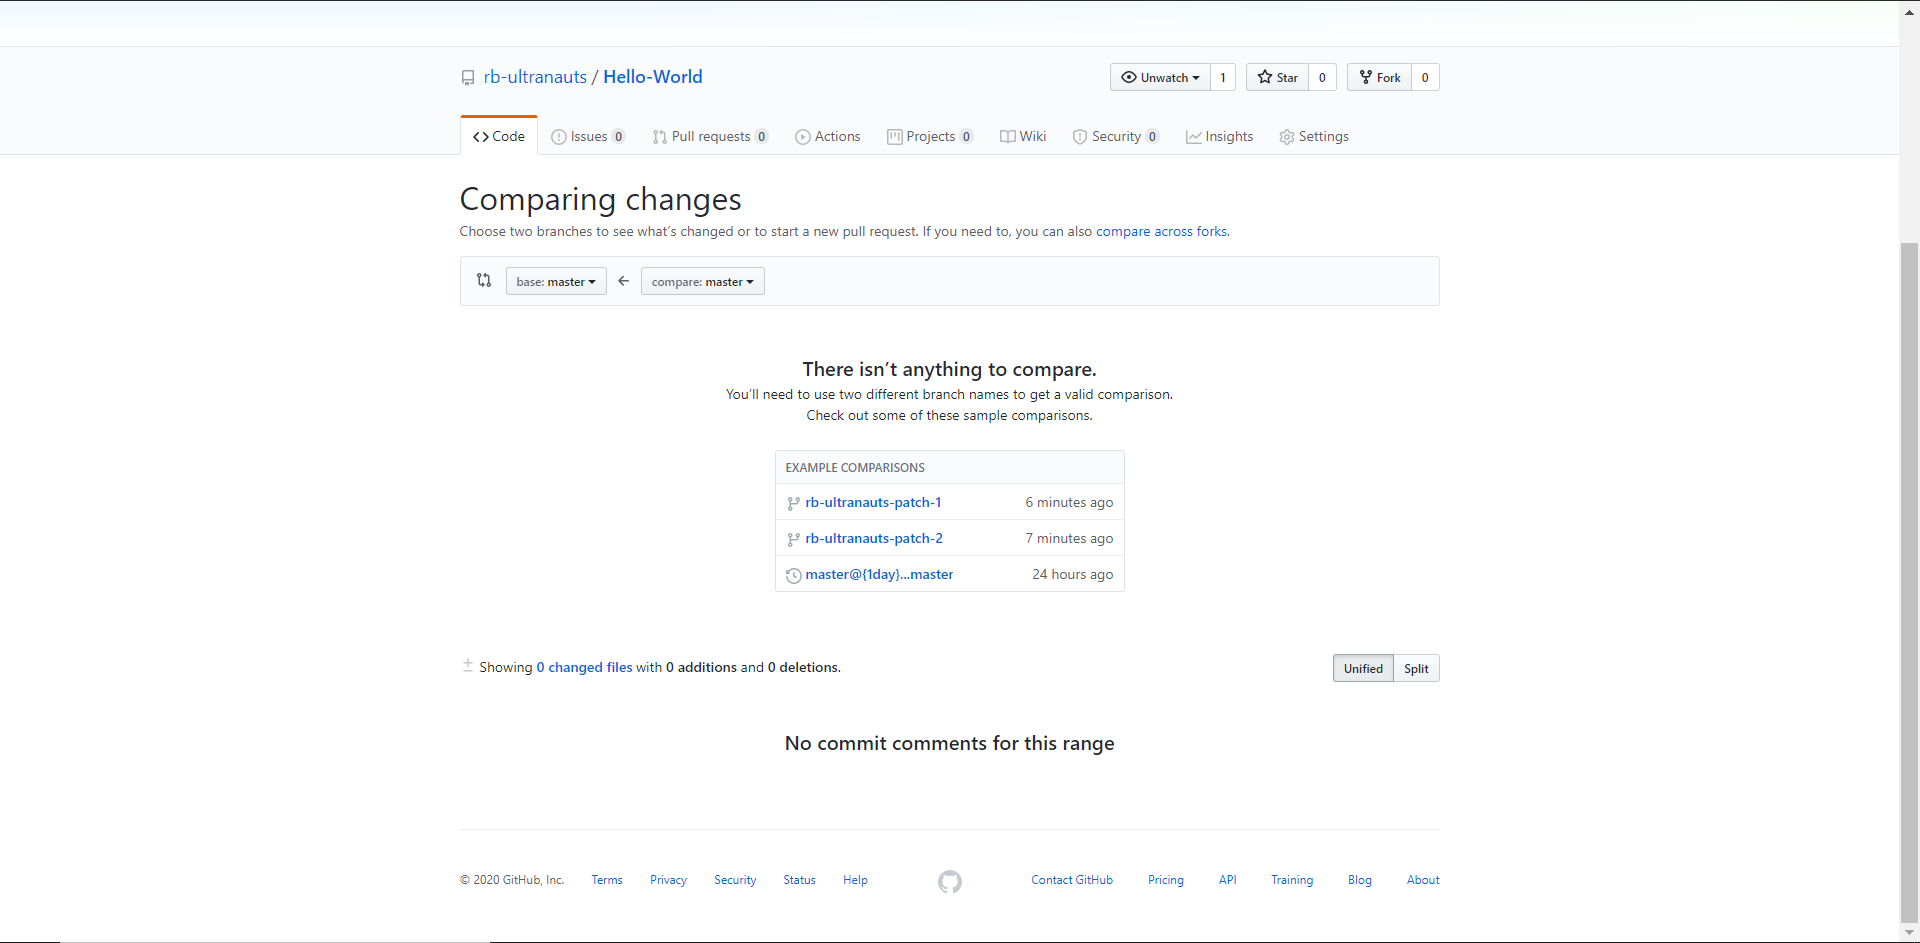 From there, the user can select a base and compare. The base branch will be compared to the compare branch and GitHub will generate a pull request to merge the changes from the compare branch into the base branch. Note that if there are no differences between two branches, then GitHub will not let you try to generate a pull request and merge them. Once the pull request is created, the pull request can be selected and the merge confirmed.
Merging in Git uses the merge command shown below:

Improving Testing with Git and GitHub
This guide will provide information on how to improve the software testing workflow through the use of Git and GitHub, as well as provide guidance on the use of Git and GitHub in general. !GitHub and Git GitHub and Git are used for version control in a project; they keep track of the project's history, keeping track of different files and the history of their contents. Git is the tool used to manage version control for different local repositories set up for it. GitHub is an online service that is used to host Git repositories online, offering additional functions in addition to version control, such as:- Bug tracking
- Project Management
- Access control
Getting Started with GitHub and Git
One of the first things a tester can do to get started with GitHub and Git is to create a free GitHub account at https://github.com/join. To setup Git locally, you'll need to install Git from https://git-scm.com/downloads. Select the Git version matching your operating system and proceed to the next page, where Git should download automatically. If it does not download, select the version of Git that best matches your system (32 or 64 bit). From there, you can run and install Git, although the exact install method may vary depending on your operating system.Repositories
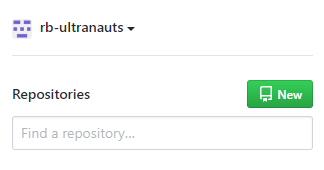
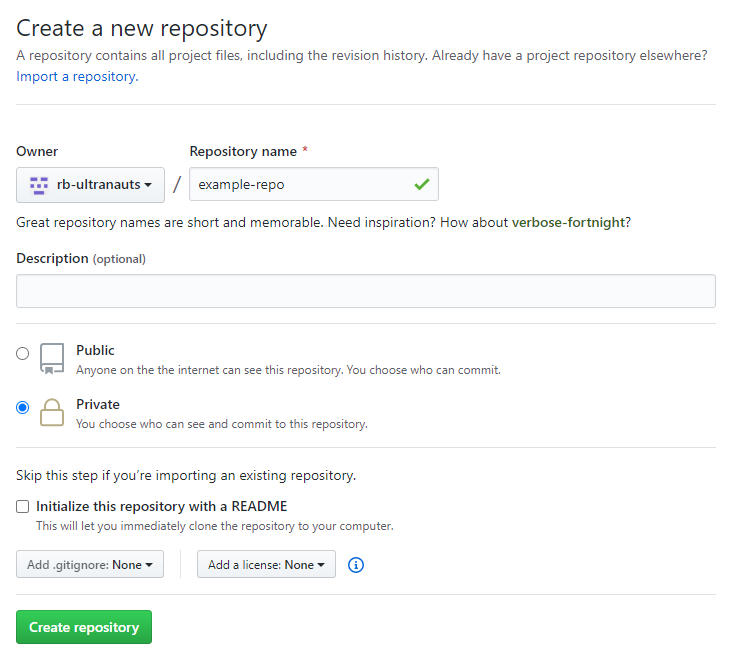
Repositories can be set up to store sets of files in either GitHub or Git. Creating a new GitHub repository is very simple; just log in to GitHub and create a new repository by clicking the new repository CTA, shown below. On the following page, simply create a new repo filling out a repository name and choosing the create repository option. You can also set the repository to be public or private. Public repositiories can be viewed by anyone, while access to a private repository is controlled by the repository owner. An option to import repositories to GitHub also exists.
 Repositories can also be created directly in Git using the steps below.
 - Open Git and create a directory for the repository or go to the directory of the project you want to convert into a Git repository. Enter the directory.
- Enter the command "git init"
- If necessary, write the files for the project. Add all files for the repository via the "git add" command. Note that each file needs to be added with a separate command. Alternatively, you can use the "git add ." command to add the entire contents of your current working directory.
- Enter the command "git commit". This will establish a local GitHub repository.
Commits
Saving a file in Git requires the user to commit the changes they've made to the repository. This can be done using the following command while in the Git repository:git commitThis commit command can also be modified in various ways. For instance, the example command below has been modified to include all changed files in the commit as well as a message.
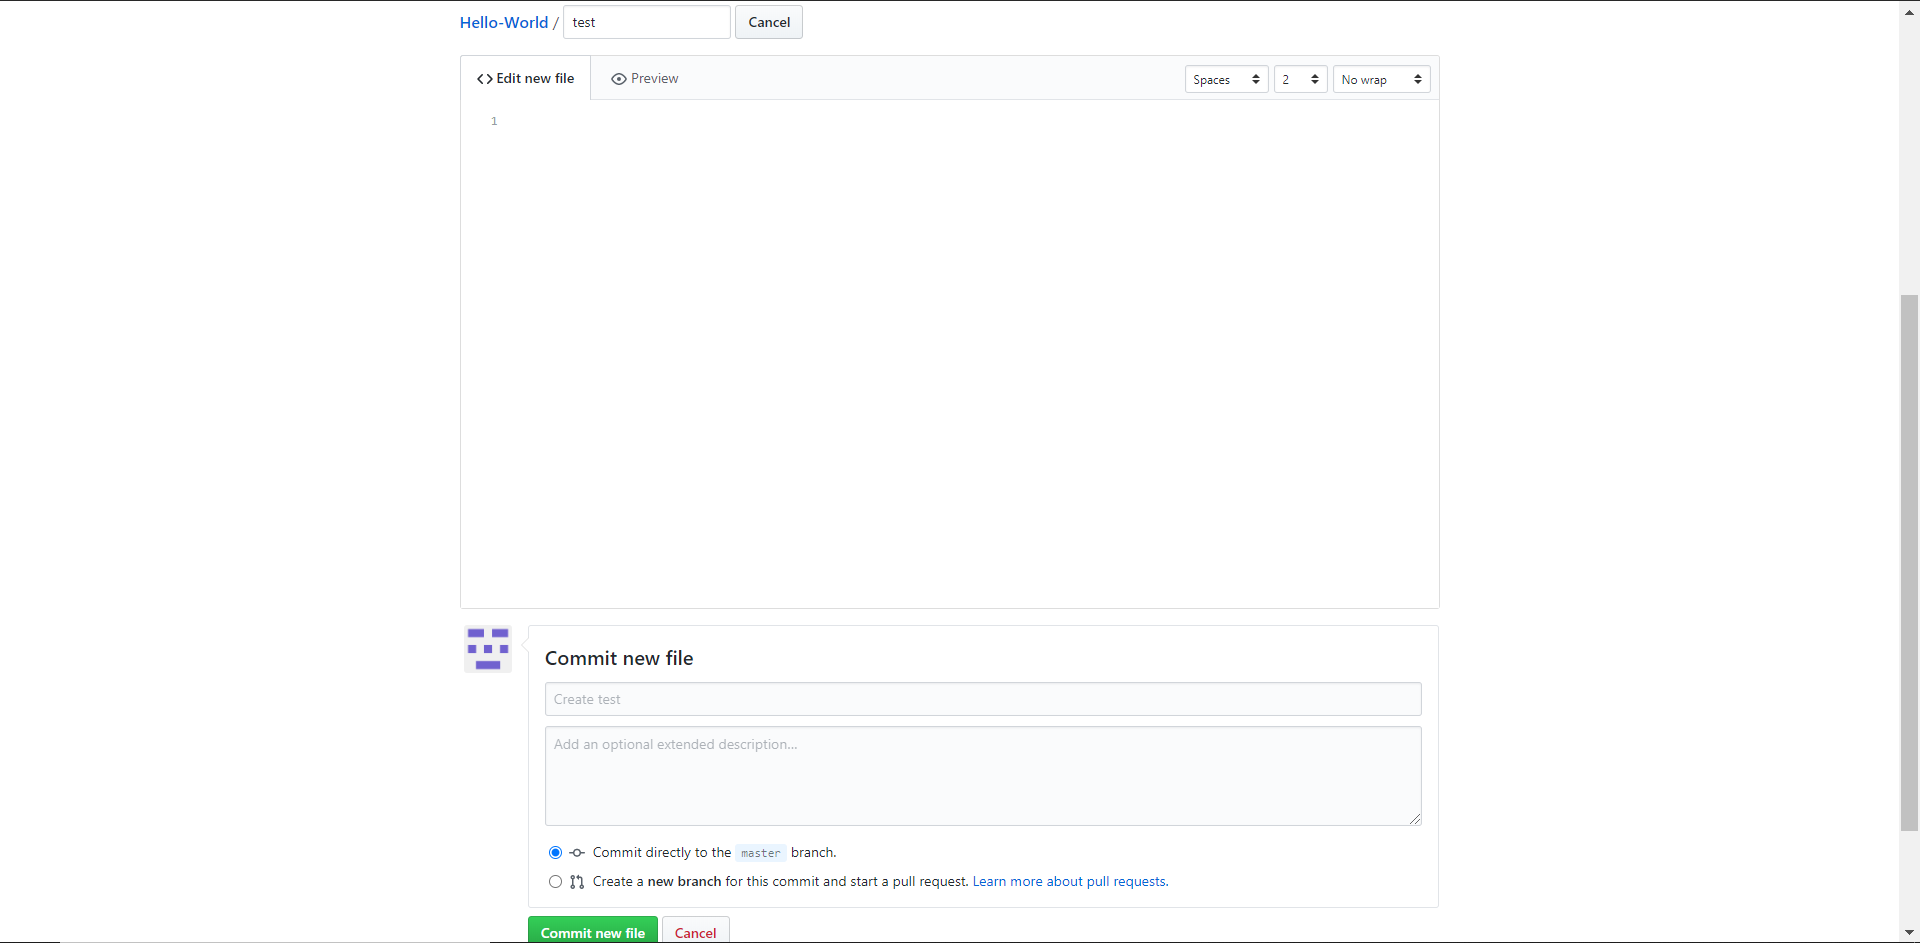
git commit -a -m "This is a message."Commits can also be easily done in GitHub and mainly comes up when a user is creating and editing files within a GitHub repository. When a user chooses the option to create or edit a file in GitHub, they'll see a screen similar to this one, although users will need to scrolll down to see everything.
 From this screen, the user can edit the file contents, preview the file, and set a commit message/description that will appear if the user clicks the Commit new file button, which commits the file to the repository. The user can also select whether or not to commit a file to the master branch or another branch of the repository. These branches can be used to set up even more options for version control.
Branches
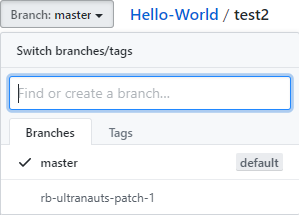
Branches allow Git and GitHub users to maintain different versions of the same repository. These branches are made by creating pointers to different commits of the repository, which the user can then access and commit to separately without making changes to the other. By default, there is only one branch, but additional branches can be added in both Git and GitHub. Creating a new branch in GitHub is simple; simply select the option to create a new branch in the commit menu when editing or creating a new file for a repository. Each commit to a new branchwill send a pull request to the master branch that can be used to merge the changes made to the branch to the master branch. Swapping between branches can be done from the drop down menu that appears next to the file name when creating or editing a repository file. Branch creation in Git works similarly, although it works with the Git command line instead of the GitHub website. To start, creating a branch can be done with the following command:
git branch branch_nameTo commit changes to a branch, you'll need to select it via the following command:
git checkout branch_nameBranches can also be deleted in Git via the following command. Note that it will not work if the branch has changes that have not been merged to another branch.
git branch -d branch_name
Merges
Branches can also be merged back together once they have been created. Merging in GitHub is rather simple, especially if a pull request to merge two branches has already been created. Since pull requests are created whenever a new branch is created, finding and accepting a pull request from a new branch simply involves navigating the Pull Requests tab of the repository and selecting the pull request you want to merge. Then, simply choose the button to merge the two brances and confirm the merge. Creating a new pull request starts with selecting the New Pull Request button in the Pull Requests tab of your repository. The following menu will appear. From there, the user can select a base and compare. The base branch will be compared to the compare branch and GitHub will generate a pull request to merge the changes from the compare branch into the base branch. Note that if there are no differences between two branches, then GitHub will not let you try to generate a pull request and merge them. Once the pull request is created, the pull request can be selected and the merge confirmed.
Merging in Git uses the merge command shown below:
git merge branch_nameA few things need to be clarified regarding this command; the merge command will try to merge the branch named in the command into whatever repository the user is currently checked into on Git. For instance, if you wanted to merge a branch named "hotfix" to the master branch, you would use the following command:
git checkout master
git merge hotfix
Note that when merging, merge conflicts may occur if the same files or lines have been changed if bone branches.
Pushing from Git to GitHub
Local Git repositories can be set up to push to GitHub. This can be done fairly easily if one already has a Git repository set up.Create and set up a Git repository. in Git.- Create a GitHub repo to act as repo to push to and copy the URL for the repository to your clipboard.

- Enter the following command on the command line to set the remote repository. Remember to replace the placeholder variable with the actual URL.
git remote add origin remote_repository_URL
- Enter the following on the command line to verify the new repository.
git remote -v
- The Git repository should now be linked to GitHub. Try adding some changes and pushing to GitHub using the command below to see if the connection between repositories works. Note that depending on the type of remote repository URL used, you may need enter your username and password when using this command, which should push the changes from the local Git repo to the GitHub repo.
git push origin masterNote that your changes to the local Git repository will only be reflected in the remote repository when you commit and push those changes to the remote repository. Commits in the local repository do nothing to the remote repository by themselves. Whenever you create or edit a file within a GitHub Repository, you will be required to commit the changes to be made. When a GitHub user creates a file within a repository, they'll see the following screen. When a GitHub user edits a file in the repository, they'll see a similar screen with the different commit options present, but with the name of the file locked.
Uses for Testing
Git and Github are useful for storing the different files and information a tester may want to use and access while working on a project, even if the project itself does not involve coding.Storing Test Artifacts and Automation
Git repositories hosted locally or on GitHub can be used to store and manage files useful for testing. Furthermore, GitHub repositiories can be shared by testers and developers working on a project, increasing collaboration and communication withhin a project team that includes both testers and developers, as it gives testers the opportunity to review code and develop a better idea of how it is expected to work based off of both code and project expectations. It encourages testers to explore and read through the code so that they can better understand how to implement tests for automation. Testers can also store impotant files on repositories, such as:- Specifications
- Test cases
- Data for testing
- Code for test automation
| I | Attachment | Action | Size | Date | Who | Comment |
|---|---|---|---|---|---|---|
| |
create repo.png | manage | 36 K | 17 Jun 2020 - 03:30 | RyanBarrett | |
| |
github new file.png | manage | 38 K | 18 Jun 2020 - 03:22 | RyanBarrett | |
| |
github new repository.png | manage | 4 K | 17 Jun 2020 - 03:24 | RyanBarrett | |
| |
github pull request.png | manage | 69 K | 18 Jun 2020 - 04:04 | RyanBarrett | |
| |
github remote repo.png | manage | 13 K | 17 Jun 2020 - 03:58 | RyanBarrett | |
| |
rb-ultranauts create repository.png | manage | 35 K | 17 Jun 2020 - 03:28 | RyanBarrett | |
| |
switch branch.png | manage | 8 K | 18 Jun 2020 - 03:39 | RyanBarrett |
Edit | Attach | Print version | History: r5 < r4 < r3 < r2 | Backlinks | View wiki text | Edit wiki text | More topic actions
Topic revision: r5 - 14 Sep 2020, JanisRancourt
PUBLIC WEB
- Toolbox
-
 Create New Topic
-
 Index
Index
-
 Search
-
 Changes
-
 Notifications
-
 RSS Feed
-
 Statistics
-
 Preferences
- Webs
-
 Automation
-
 Main
Main
-
 System
-
 Testing
© 2020 Ultranauts - 75 Broad Street, 2nd Floor, Suite 206, New York, NY 10004 - info@ultranauts.co


