 |
|
You are here: Ultra Guide>Main Web>GettingStarted (01 Jun 2020, KellyEverlyHall)Edit AttachTags
Getting Started - Creating Topics
 What are "Webs"?
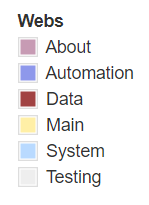
- "Webs" are like folders that have been created to address a specific topic or group. For example one of the "Webs" is Engagements which is a folder that contains Topics and Links that focus on specific client engagements. The different "Webs" are listed in the left-side navigation bar.
- List of Public facing Webs:
 Topics - pages that get attached to a Web
Why Create a Topic?
- To capture a process, capability, lesson learned, or strategy that others have not previously captured that would benefit and/or save time for Ultranaut teammates
- To communicate a new offering at Ultranauts (something you don't want to get lost in a Slack Channel)
Creating a Topic
Before Creating a Topic Consider:
- Always creating a Topic in the Sandbox as a best practice, that way it is not visible to the Web topic group before it is ready for team consumption
- Use proper HeadingLevelStructure ♿, this will aide teammates with disabilities that use screen readers
- Use only one Heading 1 header, all other headings should be Heading 2 or below like creating an outline
How-To Instructions:
- From the "Welcome to Ultra Guide" home page select the Sandbox link from the left-side navigation bar under "Webs"
- Read the Sandbox page instruction
- Particularly focus on CamelCase naming convention instructions
- NOTE: Your team or Webs might have a naming convention that you should follow, check your Webs page first for any instructions
- Click the
 Create New Topic button
- A form will open, add a Topic Title using the CamelCase naming convention
- Make sure the "Allow only WikiWord " checkbox is checked
- Click the "Create this topic" button
- Your Topic has now been created and the WYSIWYG will open and you can begin adding content
- Remember to use the correct HeadingLevelStructure ♿
- Note if the WYSIWYG editor does not have the special text formatting you desire then go to this page for more Topic Markup Language (TML) options
- Remember to use the correct HeadingLevelStructure ♿
Attaching Files and Images:
- Save and Close the WYSIWYG editor
- From the bottom nav bar select "Attach"
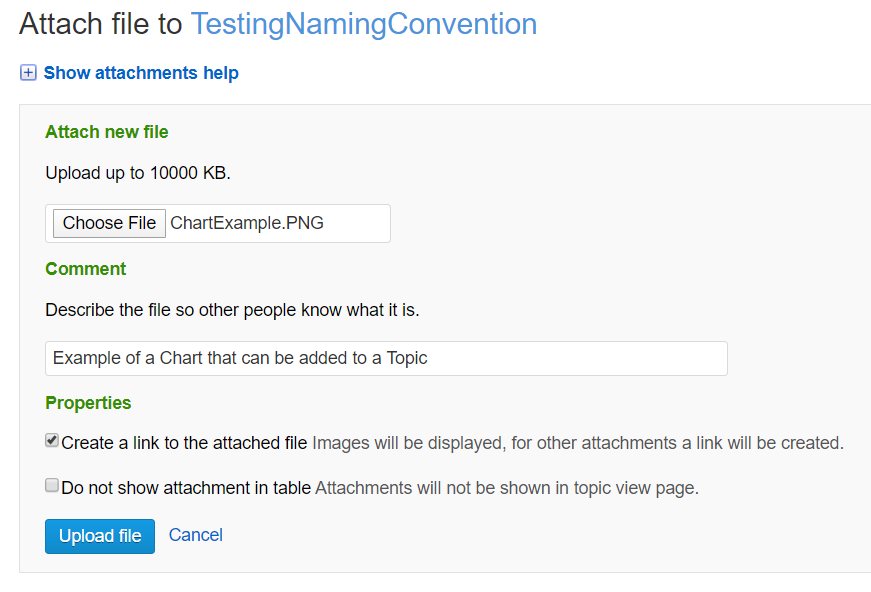
- Click the "Choose File" Button
- Select a File
- Describe the file in the Describe text field
- Check the " Images will be displayed, for other attachments a link will be created" checkbox
- If you do not want a list of attachments to be associated with your Topic page then Click the " Attachments will not be shown in topic view page" checkbox. (NOTE: This means you will not be able to manage you attachment so if there is an error or if there is something you want to change you will have to attach a new instance of the file)
- Click the "Upload File" Button
- Open the WYSIWYG editor
- By default the file you attached will be at the bottom of the page to move it cut the image or file link and paste it where you desire it to be located
- To resize images highlight the image and drag one of the corners inward
Screen capture for File Attachment process outlined in text:
Adding Space Between Elements on the Page:
- To add space between text elements just press the "Enter" or "Return" key on your keyboard
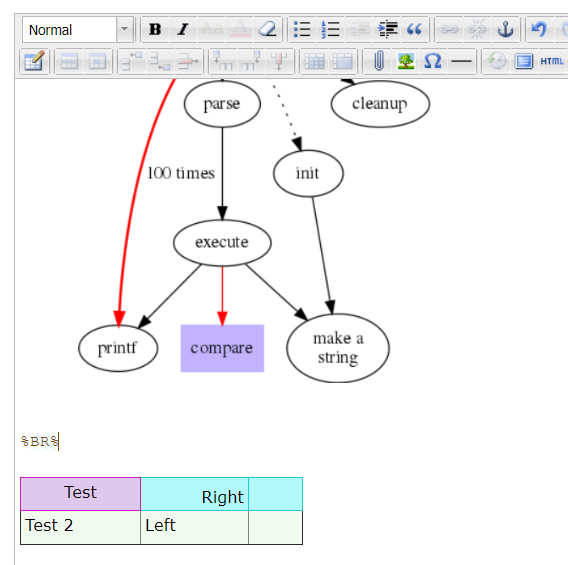
- To add space between two elements on the page add the following code between the elements:
%BR%
Break code added to create space between two elements on the page:
Adding a Table:
- Click the "Insert/Edit Table" button
- Edit the number of Rows and Columns if you want more or less than 2 of each
- If desired select the alignment for the placement of the table on the page (Left, Center, Right)
- Click the "Advanced" tab for more table options
- Click the "Insert" button
- Once the table has been added you can stretch the table to the desired height and width and add text
- To make edits that affect an entire row Click the "Table Row Properties" button (NOTE: this one can be a bit tricky and you might want to use the cell edit button instead. If you use this one make all your row decisions ahead of time and not later)
- To make edits that affect a cell only, Click the "Table Cell Properties" button
- You can also add and delete rows and columns
Adding Code Snippets:
- The best way to add code snippets is to Save and Close the WYSIWYG and Click the "Edit wiki text" link in the bottom nav bar. It can be done in the WYSIWYG but you might experience some performance issues.
- Put the code inside of an open/closed <verbatim>
<verbatim>:smile:</verbatim>
Adding Other Cool Things:
- This link https://ultra.guide/bin/view/Main/DoCoolStuff has links to other cool things you can add to your topic like:
- Emojis

- Can be added in the wiki editor by typing the emoji name withing a pair of ::
- Office Icons


- Creating flow charts (using simple code)
- Before adding a flow chart Save your Topic
- Click "Edit Wiki Text" in the bottom navigation bar
- Then add the code from the flow chart page
- Rending Math
- Search Pattern Cookbook (hint not a guide for how to cook)
- Embed Iframes
- Create Org Charts (using simple code)
- To view the code for this element Click on the "View wiki text" link in the bottom navigation bar
- Combine Multiple Topics
- Make Calendars
- Click "Edit Wiki Text" in the bottom navigation bar
- If need be add space before the calendar add this code
and then press "Enter" or "Return" on your keyboard - Add this code so a calendar can be added to the page (shown below):
- Emojis
%CALENDAR{showweekdayheaders="1"}%
|
|||||||||||||||||||||||||||||||||||||||||||||||||
Renaming or Moving a Topic
- Once your Topic is ready to be moved make sure you have Saved it and the WYSIWYG is closed
- From the bottom nav bar select the "More topic actions" link
- Navigate to the "Rename or move topic" section of the page
- Click the "Rename or move topic..." button
- From the "To Web" drop down menu select the Web you would like your topic moved to (Example: select "Testing" from the drop down menu)
- In the "To topic" text field edit the Topic name (if desired)
- Click the "Rename/Move" Button to save the changes
- Navigate to the Webs that you wanted your topic to be moved to and verify it has been move
Spell Check
- Close the WYSIWYG and Click "Edit Wiki Text" in the bottom nav bar
- Click (or move focus) into the edit window and give it a second
- Typos and spelling errors will appear with a red underline
Getting Started - Video Capture:
- Getting Started, Part 1, Video Capture (not narrated): Ultra_Guide_GettingStarted_p1.mp4
- Getting Started, Part 2, Video Capture (not narrated): Ultra_Guide_GettingStarted_p2.mp4
- Getting Started, Part 3, Video Capture (not narrated): Ultra_Guide_GettingStarted_p3.mp4


| I | Attachment | Action | Size | Date | Who | Comment |
|---|---|---|---|---|---|---|
| |
Attaching_File.PNG | manage | 45 K | 10 Apr 2020 - 14:24 | UnknownUser | Screen capture of file attachment process outlined in text |
| |
Ultra_Guide_GettingStarted_p1.mp4 | manage | 9 MB | 10 Apr 2020 - 22:13 | UnknownUser | Getting Started, Part 1, Video Capture (not narrated) |
| |
Ultra_Guide_GettingStarted_p2.mp4 | manage | 5 MB | 10 Apr 2020 - 22:22 | UnknownUser | |
| |
Ultra_Guide_GettingStarted_p3.mp4 | manage | 9 MB | 10 Apr 2020 - 22:24 | UnknownUser |
Edit | Attach | Print version | History: r13 < r12 < r11 < r10 | Backlinks | View wiki text | Edit wiki text | More topic actions
Topic revision: r13 - 01 Jun 2020, KellyEverlyHall
PUBLIC WEB


- Webs
-
 Automation
- Main
- System
- Testing
© 2020 Ultranauts - 75 Broad Street, 2nd Floor, Suite 206, New York, NY 10004 - info@ultranauts.co